Tuesday, January 25, 2011

Eclair

In the spirit of giving welcome baby gifts to 6-month-olds, here's a little something I just presented to a pretty little girl named Emma-Clair, who is so sweet she's cream filled.   And they call her "Eclair."  And I think that's just about the cutest thing ever. 


So I added a little eclair applique,


which Miles really liked.

That's his grubby hand right there, trying to pry it off the blanket.  Don't worry.  I stitched it on tight.
 
Like practically everything else that comes from my craft room, the story of this quilt began in the clearance bin.    I needed some new blades for my rotary cutter, and happened upon a chenille cutter marked down 75%.  I had no idea what I'd do with a chenille cutter.  But I knew it was cheap, and I figured it could cut fabric, so I brought it home with me.

Not long after that, I happened upon this tutorial on Aesthetic Nest, and suddenly the instructions that came with the chenille cutter made a lot more sense.


So here's how it works.  You layer several pieces of flannel (or other soft cotton)  and then stitch in parallel lines on the bias. 
Then when it's all stitched up, you use your chenille cutter to slice between the stitches.  And then you add embellishments, or whatever, and then bind it.  Then you throw it in the washer and dryer, and all the raw edges you cut curl up and get fuzzy.  The more you wash it, the more it curls.

The process is a little time consuming, but it's straightforward.  And actually kind of fun.  I used a set of flannel receiving blankets, so the finished quilt is pretty small.  I don't think I'd want to tackle anything bigger, cause I'm lazy, and even turning this little thing under the arm of my machine was a little cumbersome.

I do have one little tip I didn't see mentioned in any of the online tutorials I found.  Dana at Made (see her version here)  suggests changing your needle position to get the lines spaced evenly about 1/2 inch apart.  But I can't adjust the needle position on my machine, my presser foot was too narrow to use it as a guide, and I didn't want to have to draw lines to follow for the whole quilt.  So I added a piece of stiff tape to the bottom of my presser foot and lined the edge of the tape up with the previous line as I stitched each new row.    Like so:


After a while the tape started to curl up, and I'll admit I rushed things a bit, so the rows are not perfect.  There are other flaws too, but I won't bother pointing them out, because if that cute baby Eclair is anywhere nearby, I guarantee no one's gonna notice a few wonky lines and errant stitches.  They'll be too busy tickling her cream-filled belly, or gazing into her gorgeous chocolate eyes.


Tuesday, January 18, 2011

Pimp My Pixar Character

When Porter's mom, Melissa, invited us to his Toy Story-themed-4th birthday party, I immediately thought of this fun vest, made by the cute and clever Jessica at Running with Scissors.   

I stalk lots of craft blogs, and frankly, most of them are kind of annoying.  I try to ignore the constant self-promotion.  I overlook spelling and syntax errors.  And though I'm puzzled by rAndOm capitalization, and saddened by apostrophe's that 'sneak in everywhere except where theyre 'supposed to, I can usually  get past all that to enjoy the pretty pictures and the clever ideas.   But the great thing about Jessica's blog is that I don't have to get past anything.  She inspires me without annoying me, and I like to think if we met in person we'd be friends.   That is, if I don't annoy her with all my hypercritical crafty and linguistic nitpicking.  

Now, where was I?  That's right.  Porter's birthday.  So, the kid likes Toy Story.  And I knew I could get my hands on a pattern for a Woody vest that promised to be easy.  And I knew I had this fuzzy spotted fabric that really looks more like dalmatian print than cow print but might work anyway.  So I set to work.

I printed out Jessica's pattern, and kind of eyeballed her general shape while I enlarged it out to fit my 6 1/2-year-old (who, because he won't eat his vegetables, is barely a smidge bigger than 4-year-old Porter).  Then I cut it out and sewed it together, and really was amazed that it was a 15 minute project just like Jessica said.  Except.  Except!  Except I didn't have any bias tape to finish the edges.  So I thought  "I'll just line it and make it reversible.  It can't take that long -- probably less time than making bias tape, right?" 

Wrong!

Turns out making a reversible vest is a titch more complicated than making a reversible purse.  You can't just sew one and then sew the other and then sew them together, or you won't be able to turn it right side out through the shoulders.  (Don't worry, I don't really get it either.)  So, I consulted with my spacial engineer (my husband), and unpicked a few seams, and added a western style fringe vest to the other side.  

Trouble was, adding the lining made the fuzzy material puff out, and suddenly, this whimsical kid's vest looked like Woody's vest after it spent a day on the set of Pimp My Pixar Character.  So I did some ironing and topstitching, and it all turned out OK in the end.

Still, maybe I should have just gone to the store for cow fabric and bias tape.*

Porter was a little afraid of it (me?) at first.    But he warmed up to it after his sister Addie showed him it was OK.


Look at her, showing off the fringe and the spots at the same time!  She's a natural!
Here's Porter, modeling the fuzzy side.

That's Sheriff Woody to you, Pal.


Anyway, despite its shortcomings, I think Porter liked his Woody (inspired) vest.   And next time, I know to just buy the bias tape.  (Or, as my spacial engineer suggested, a purple feathered cap, to go with the vest.)

________


* But I didn't, thereby earning me a million stash reduction points.  Since you asked (cause you did, right?), I've had the fuzzy dalmatian print for over a year.  I inherited it from a friend who cleaned out her stash when she moved.  The brown fabric is a velvety stretch knit I bought at Wal-Mart several years ago.  I bought 10 yards at $2 a yard, and hung it all up as curtains in my dining room.  After a year or two, I got sick of them there and hung them in my bedroom.  But they were too dark there, so I decided the next best thing to do with them would be to sew an Easter dress out of them.  Unlike some experiments in wearable window-treatments, this was a phenomenal craft fail.   On many levels.  But, on the bright side, that unshapely, unsightly, unworn Easter dress eventually became a Jedi robe for my husband.  And there were still many yards left to use on other projects, like Jedi cloaks.  I've also used it for more practical things, like concealing all the junk under my craft table, and covering cardboard boxes.  We're down to just 2.5 yards.  Do you think that's enough to give that Easter dress another try?

Wednesday, December 29, 2010

Laney's Dolls


I'm so excited about this project.  It was a gift for my friend Laney.  A baby gift, actually, for her little girl who (you may notice) is no longer a newborn.   Milly was born in June, but the idea was born at a service auction in March.   I'd donated a couple of dolls, customizable to the winner's specs, and  Laney, our enthusiastic auctioneer, suggested that the winner could have a husband and wife set made.  She was really excited about the idea, and credited her prodding with driving up the auction price. I thought it sounded like fun, but I wasn't sure how Black Apple doll styling would translate onto male dolls.  So I was kind of glad when Sara, the winner, had something else in mind, and the doppelganger doll idea was dropped. 

I picked it back up again, though, a few months later while contemplating a gift to make for Laney's baby shower. Unfortunately, I knew I didn't have time to execute it before the shower, so I gave her a note that said something like "I know you like surprises!  And that's what  your gift will be!  Later!"

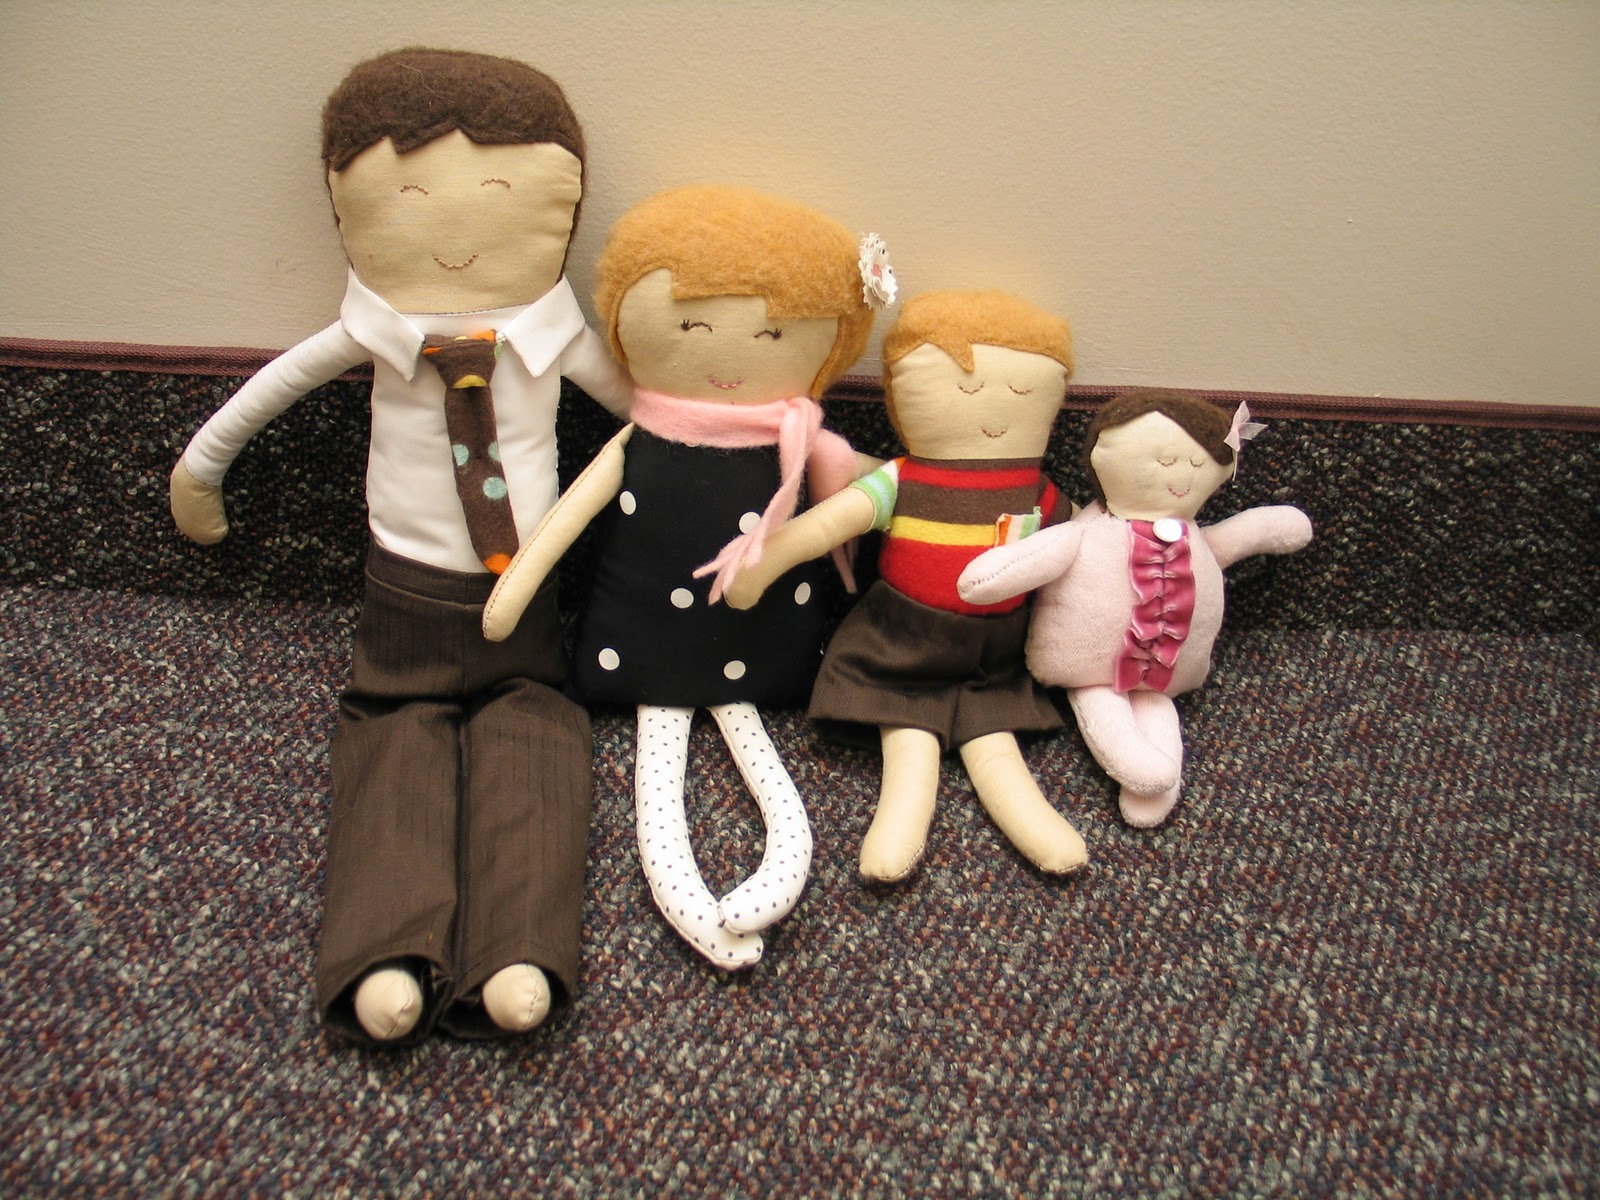
Part of the surprise, I'm sure, was just how much later this gift would arrive. Days before sweet baby Milly's six month-iversary, I finished and delivered this little family.  


Maybe you have to know Laney (an endeavor I recommend wholeheartedly) to appreciate this.    But I'm going to go ahead and point out some of my favorite details.

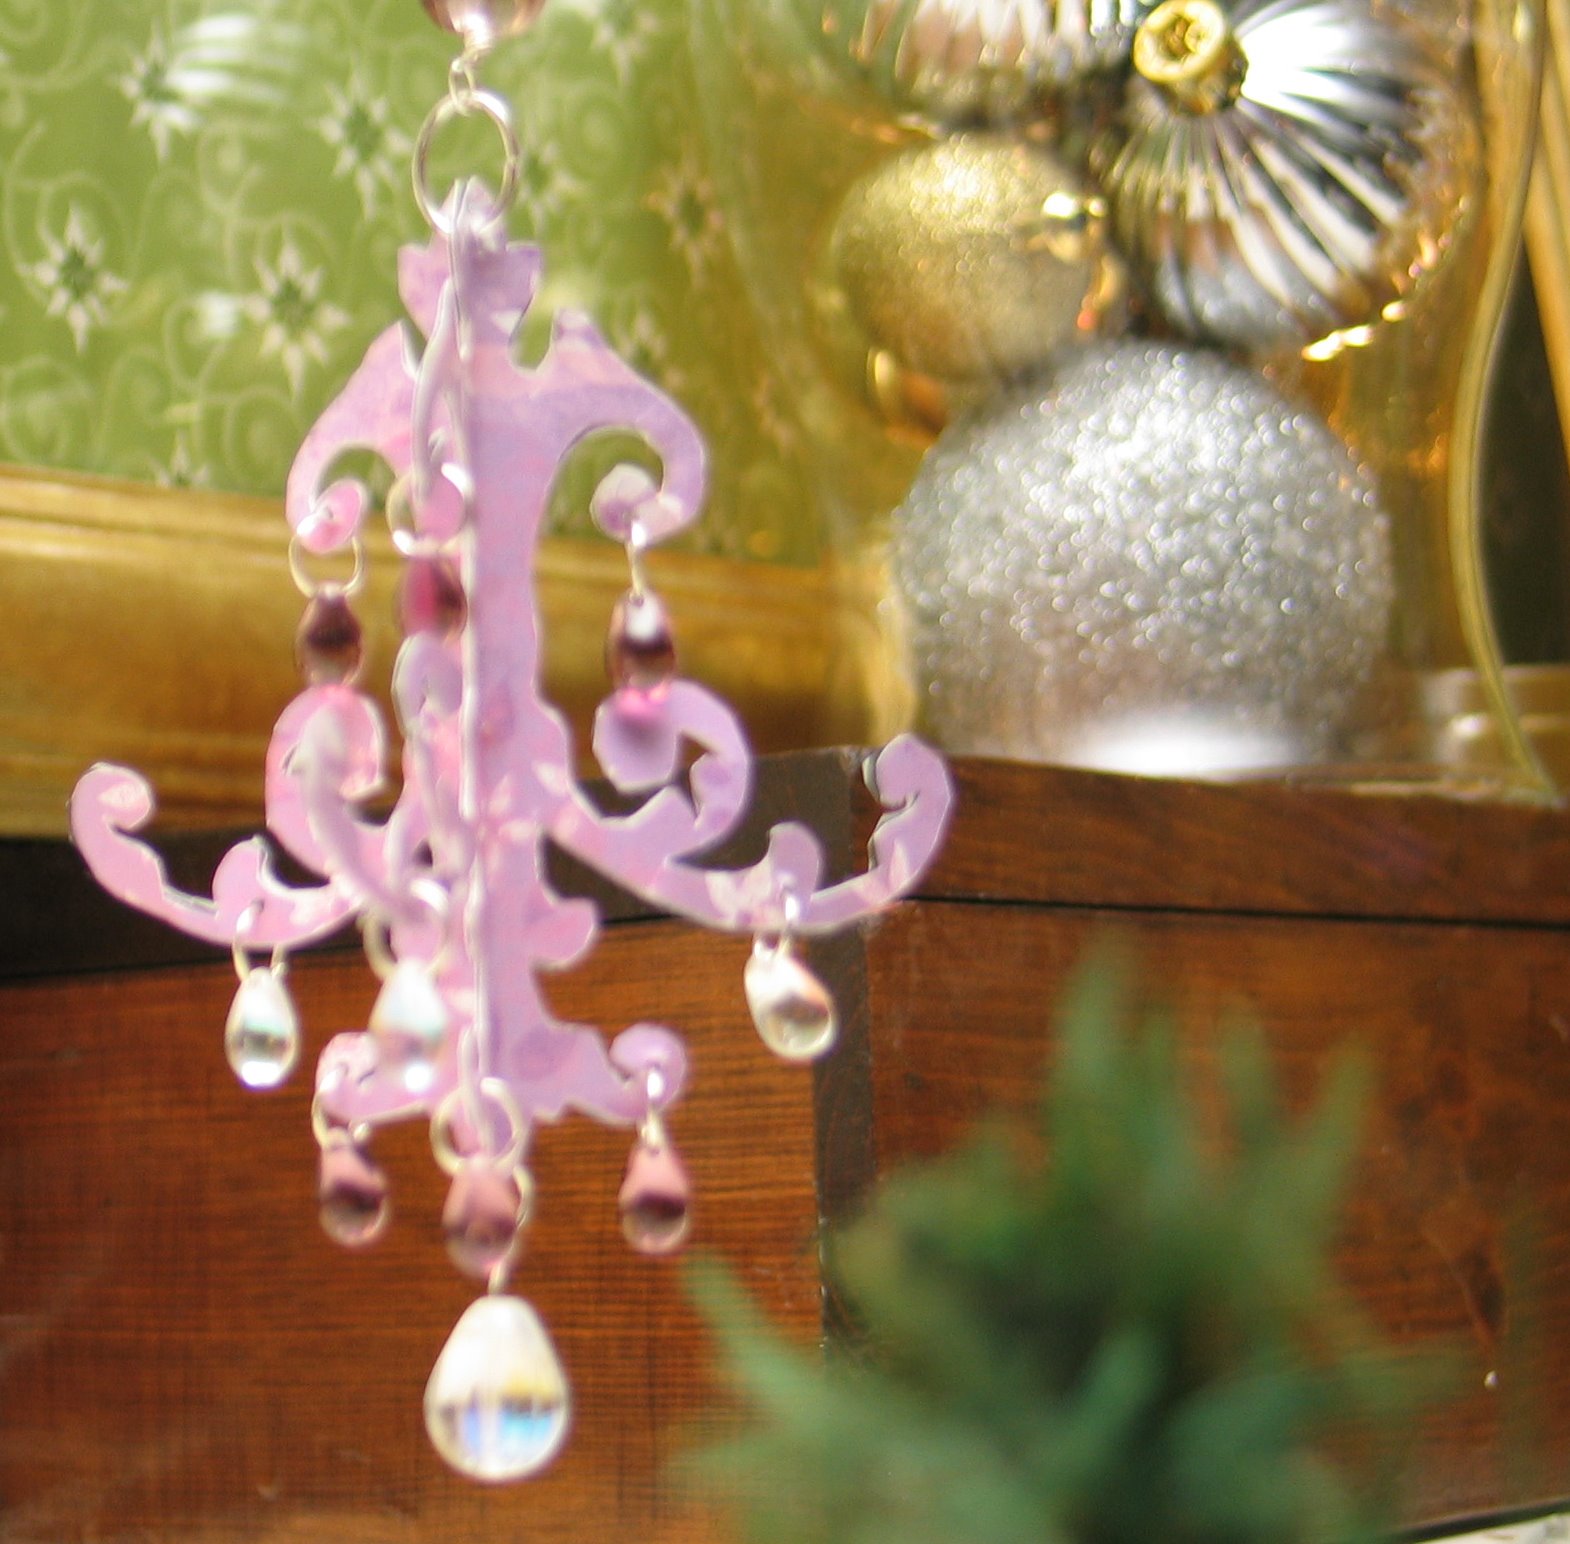
Prototype Milly with fancy earrings.
Milly was the first doll completed.  I started with the basic Black Apple doll pattern and shrunk it, but I wasn't entirely happy with the shape of my first attempt.  The arms are too long, the head is too big, and the body is misshapen.  Lucky for me, Grace loved it, (she's got a soft spot for the deformed ones), and (after a few requested embellishments) happily claimed ownership of the prototype.   I made a few changes to my template, and ended up with Milly 2.0, which I like a lot better.
She's wearing velvety pink baby pajamas harvested from a pair of velvety pink baby pajamas Grace used to wear.  I added a little bum flap cause I think that's cute, and a tiny pink bow cause Milly's not allowed to wear giant flowers in her hair.


Henry was next.   His best detail is the tiny pocket, just big enough for a Lego mini-figure rifle.  I know cause Sam tried it. 

 
He's also got removable shorts and a fetching little chunk of spiky hair.

To Sam's disgruntlement, I was happy with Henry 1.0, and there wasn't a prototype for him (Sam) to keep.  He has put in an order for a little boy doll of his own EXACTLY  like this one.  I didn't have the heart to tell him that I'm out of the stripey flannel I used for Henry's shirt.  But as long as Sam's version has a pocket, I think we'll be OK.

And now we come to the best thing about the whole set:  the (almost) (sort of) completely-to-scale sizing of the happy couple.  Taylor is the perfect match for Laney, smart and funny and clever and remarkable in hundreds of ways.  But if you meet him (and I recommend that you do), I guarantee that the first thing  you'll notice is his height.  He's nearly 12 feet tall.


Laney, for her part, is a bit more down-to-earth, and the juxtaposition between them in real life is (bless their hearts) a little comical.  So that's what I was going for here.  And I hate to brag, but I think I nailed it.  Doll Taylor's crazy doll height had me giggling through the whole construction process, and because I was having so much fun, it was really hard to keep it a secret.  But I did, even though it took me months and months to finish.
One of the reasons it took so long was that I had a hard time conceptualizing how to create and attach Taylor's tie.  In the end, it was pretty simple (and not all that different from the human-sized tie modeled by Sam here).   But for some reason I just couldn't wrap my mind around how to do it, until I just sat down and did it.


Another delay was that I had to make a couple trips to the craft store for supplies.  Don't be shocked.  I usually (proudly!) complete stuff like this with only my stash on hand.  But I needed to get just the right color felt for Laney's (and Henry's) hair.
And I also had to get embroidery floss, for stitching faces.  The faces on all my previous dolls have been drawn on with Sharpies.   I never loved the results, but I was scared of paint (Emily Martin's technique, seen here) and thought stitching would be too time-consuming.  I was wrong.  Taking a few minutes to hand-stitch is totally worth it.  So much cuter, isn't it?  And the added bonus is that unlike drawing with a Sharpie, stitches can be easily removed if I make a mistake.  (I won't tell  you how many times I re-did Laney's lashes.  But isn't she a looker now?  Oh la la!)

After her eyelashes, the next best part of Laney's ensemble is the little fabric flower in her hair.  It's attached with a tiny dot of Velcro, so she can take it off on days when she's feeling not-so-flashy.  The pink button matches her fuzzy pink scarf, which, incidentally, matches a pink scarf Laney happened to be wearing the other day when I finally gave her the set.  Also, she was wearing black.  (Am I good or what?) 

I meant to add earrings, but apparently I forgot.  Also, I contemplated cuffs and cuff links for Taylor, but decided it was time to just be done.  Maybe for his birthday.  Or Laney's.  In 2015.

Tuesday, December 14, 2010

Melanie

Melanie is cute and stylish and hip. And she's moving away.

I wanted to send her off with something useful and pretty that she wouldn't have to pack or wrap or box.

So I came up with this little makeup bag.   It went together really quickly, once I finally found the right fabric.  I sorted through lots swatches to find the right combination of cute and stylish and hip.  In the end I went with a couple home dec samples and a strip of golden silk, all picked up for next to nothing at the JoAnn closeout sale from whence my stash was born.

I know it's totally tacky to make a gift for someone and then brag about how little you spent.  But it's part of the thrill of creation for me, and at this point in my life I've given up hope of de-tackifying.  So, the zipper was 10 cents (They were begging us to take them at 10 for a dollar.  I'm kicking myself now for only buying 20.), and the sample squares were about $1.  So, I used about one square total (half for the inside lining, half for the outside), plus a smidge of silk, which I'm arbitrarily valuing at 20 cents. And there you have it: a pretty little purse for less than two bucks.

But wait!   There's more!  You can't just give away an empty purse. 

So I whipped up these dangly earrings.  As with the purse, selecting and planning took longer than executing.  It takes time to get it just right.    

And again, these were 100% stash-made.  The tear drop components and the ear wires are leftover from the supplies I bought in July to make jewelry for my sister's wedding.  The chain is cut from an old necklace from my salvage box, and the beads were hand-me-downs from my friend Amy.  Less than a buck spent there. 


Plus, I earned major stash reduction points.

Have I mentioned that I'm moving in 6 months?  And that my goal is to USE my stash, not MOVE it?  I'd better get to work!
Posted by Picasa

Monday, December 13, 2010

Ornament Exchange 2010

They say two bad pictures don't make a good one, but in this case, it'll have to do!


This is the ornament I made for the annual Christmas ornament exchange party.  As usual, I was working till the last minute and didn't take a picture before the party started.  Fortunately, for me, the party was at my house, so I had a chance to snap a couple blurry shots during the festivities before my friend Laney took it home with her.

The idea and the design came from this clever lady, who does amazing things with paper.

I really love it, but I'm not making any more until I get my silhouette machine for Christmas, (Shh!  It's a surprise!  Don't tell me!) cause cutting around all those curves with scissors and an exacto knife was kind of a pain.  And the end result is kind of messy.

But as long as you don't look too closely, it's quite something, isn't it?

As much as I love it, I love the handmade ornament exchange tradition even more.   This year, instead of making a full set of ornaments to trade, participants brought a single (handmade or not) ornament.  We played a little pass-around game to How the Grinch Stole Christmas, and everyone got to take home the ornament in-hand at the end of the story.

I got to keep this little couple, made by my friend Jessee


Crazy cute, aren't they?  And they smell amazing.   I hung them high to minimize temptation for the little ones.  Unfortunately, that means they're right at eye level for me.  What are the odds they make it through the season on the tree instead in my belly my kids' bellies? 

As long as I was snapping photos, I wanted to get shots of some of the ornaments other guests brought this year, as well as some favorites from previous years' swaps. (You know, so I can steal their ideas later, of course!*)  Unfortunately, my camera battery died before I could photograph them all (both at the party, and again tonight.  Time for a new battery!), so this collection is incomplete.  (And also blurry.  Because in an effort to get a few more shots out of the battery, I turned off the digital display.  Turns out I'm not so good with the view-finder.)


I wish I could remember who made all of them, so I could give credit, but some of them are from as far back as 2002.   But here's what I recall:

First row:  1) Judy Weston, 2002; 2) Rabecca Pierce, 2009; 3) Brown haired lady with lots of kids, 2002; 4) Rachel Winsor 2002
Second row:  1) Margaret Peterson, 2009; 2) Sara VanRy, 2009; 3) Someone Awesome, 2002; 4) Alaska Turner 2009
Third row: 1)Oops.  I didn't mean to put Judy Weston in twice, 2002 2) Maryann Nelson, 2002; 3) Rabecca Pierce, 2010, 4) Natalie Dayton, 2010;
Fourth row:  1) Natalie Gardner, 2010; 2) Stephanie Evans, 2010; 3) Denyse Carter, 2010, 4) Erica Smith, 2009


And finally, for my own photographic records, here's one I made for the exchange in 2007.  They were all different variations of a beaded bow theme.  Come to think of it, every ornament I've made for an ornament exchange has had some kind of beady ribbon thing going on.  ( Here's last year's set.) It's like I'm obsessed! 


*It didn't even occur to me that it was weird to take pictures of everyone's ornaments, until a friend asked if I was going to get a group shot with everyone (perhaps) holding their ornaments.  Umm ... hadn't even occurred to me.  I photograph crafts, not people, apparently.  So you'll just have to take my word for it that there were people there, and that they--the people--were the best part of the whole night.


Posted by Picasa

Tuesday, November 02, 2010

Stuff you can make


This is a tote bag made from a vintage tea towel I found in the closet of the Relief Society room. There were dozens of them, although, sadly, not all of them featured creepy crustaceans. I'd initially planned to make it into a skirt for Grace, but then I decided on a tote bag because it was easier.

And it was easy. You can make one too! You should make one too! Come over! We'll do it together!

The battery on my camera died before I could get pictures of the inside, but it's the same striped fabric used on the handles. It's completely reversible. But why would you want to reverse it? Crustaceans! Creepy!


While you're making stuff, you might want to consider this easy girl's ruffled skirt.  Or a matching tie for the big brother.   And do I even need to mention that tie onesies are the easiest thing in the world to make, and that once you try one for yourself you'll lose all respect for me passing them off as handmade gifts.


Anyway, the point is, I have a lot of fabric to use up.  So you should come over and help me.  And take home something pretty (or creepy) when you're done.

Posted by Picasa

Sunday, September 26, 2010

Snugglesaurus


For Tiffany's baby boy.

Dinosaur silhouette from this template found here.
Posted by Picasa

Sunday, September 12, 2010

Flower card


I tend to get really excited about the prospect of craft projects before I've actually started them. I've even gone so far as to plan out dozens of variations before I've even crafted a single item. It's beautiful! It's easy! It's fast! It will be my new signature gift!

And then I discover that creating life-sized velveteen elephants takes a little more time and a lot more fiberfill than I'd expected, and I never get past version 1.0. That was the case with the sadly disfigured lamb pictured here. And the bookish bibs here. And the hungry hippo onesie. (Which I honestly think is one of my most hilarious craft ideas ever, but I made so many ridiculous blunders while putting it together that I might be too scarred to tackle another one. Seriously, this thing had "craft fail" embroidered all over it. (And by "seriously" I mean metaphorically. (But my literal embroidery wasn't too hot either.)))

I was on a bit of a roll with the tie onesies. Those suckers really are as fast and easy as they look. But it's hard to find long-sleeved onesies for adults, so I only make those for babies. (Sorry!)

So, when it comes to gifts for my grown-up friends, I've been at a bit of a loss for Beautiful! Easy! Fast! crafts. This one, however, just might be a winner.

At a craft party many months ago, I copied Tiffany and used this technique to roll a rose from a strip of an old table cloth I found in the Relief Society closet. (And there's more where that came from!) Then I added a cluster of beads and an alligator clip, and ta daa! Ten minute project. Another five to cut out scrapbook paper and attach the hair clip (I just cut a slit and slid the clip through). Add message, and you're finished in no time!

Of course, that only works if you have all the supplies on hand, and you know where to find them. The reality of this Beautiful! Easy! Fast! project is that it took 6 months from start to finish: Ten minutes to craft the flower, and 5 months, 29 days (+ a whole bunch of minutes) to remember to pick up a handful of alligator clips.

But the next one, it's going to be Fast!
Posted by Picasa

Thursday, August 26, 2010

Keep it clean

I'm a little bit in love with this fabric. Maybe a lot in love. It's from the Old Lady Collection, 100% vintage.

I'd been wanting to use it for a while,  so I was kind of excited when Amber chose it for the main print on her birthday napkins.


It's not  hard to make cloth napkins:  1. cut out squares, 2. sew.  (And there are lots of good tutorials out there.)  But I experimented a lot with different combinations of interfacing and lining fabric to get the right weight and feel.  In the end, they're all a little different, but still perfectly suited for dabbing at a spill or wiping crumbs from your lips.  (I say "your" lips because not "my" lips because cloth napkins are pretty useless around here.  Our messes require the power washer/ beach towel approach.  And if I'm putting something in my lap to catch spills, a tarp is really more appropriate.   Why protect my lap but leave the surrounding area exposed?)  But anyway, I'm sure these will do just fine when Amber invites the Queen for a picnic brunch.  As long as she doesn't invite me too.

It's all stash fabric, except for the blue print.  That I purchased from Jo Ann just for this project.  I hardly ever do that -- wander around the store with fabric swatches looking for something specific.  Usually, I scour the remnants and clearance fabrics, and if I find something cheap and pretty I take it home.  Then when I find a project I want to tackle I shop my own shelves.  (And by "shelves" I mean "shelves and bins and closets," cause we're a little past neat piles at this point.  It's time to recommence stash reduction.  Who's in?)

More than Meets the Eye


For Daniel, who likes Transformers.  Watch out kid.  Your pants are on fire.


PS:  If you think those pants are hideous here (and I do), you should see them on a child.  Both of my kids tried them, and in both cases I wanted to gouge out my eyes.  They're too  '80s post-Hammer pants for my liking.  But I guess they work with the shirt.  As pajamas.  For someone else's kid.    Sorry Margaret.
Posted by Picasa

Friday, August 13, 2010

Kathleen

I recently traveled to Utah!  With my parents!  And my three kids!  And my cousin!  And her baby!  By van!  We had many wonderful adventures and beautiful moments with family and friends.    But it wasn't what you'd call a relaxing trip.
And that's why my mother's childhood friend, Kathleen, was such a saint to host us.  She knew what to expect -- our family has been staying at her house every-other-year for decades now -- and yet she welcomed us enthusiastically.  This time there were seven of us sprawled throughout her home (me, my parents, my three kids, and my sister), plus all my other siblings (7 more) and their kids (25 more) visiting throughout the week.  We were a loud and messy crowd.
But Kathleen is the world's most gracious hostess, and didn't seem to mind our crash 'n trash protocol one bit.  With closets full of toys and freezers full of homemade ice cream, her home was a haven.  My kids couldn't wait to get back there after each daily adventure.  They even begged during our two-night stay at a mountain ranch -- where they could swim, ride horses, paddle boats and eat snow cones -- to "go back to Kath-a-leen's house" so they could play with legos.  Needless to say, we all  had a wonderful time!
So I wanted to make Kathleen something special to thank her for her hospitality.  Her house is full of vintage linens, precious collectibles, and artwork by Thomas Kinkade.   With that in mind, I wanted to come up with something delicate and floral. I didn't have my full stash at my disposal, just a few basic supplies (tools, chain, jump rings) and some miscellaneous items I'd ordered from Fire Mountain Gem's clearance section and had shipped to meet me in Utah.  (The majority of the order was jewelry for my sister's wedding, but I'll get to that later.)

I lucked out with this pendant/ brooch, which I ordered on a whim, thinking it looked nice enough, and that at 84 cents it wasn't much of a risk.  It's so much prettier in person than it was on the website, and I'm kicking myself now for not stocking up!     
It came with a removable stick pin you can slide through two brackets at the back so that it can be worn separately.
photo from Fire Mountain Gems
And because I love versatility, I also wanted the chain to be pretty enough to be worn alone, single or doubled, clasped in front or back.  When worn together, the pendant can be hooked to the heart-shaped clasp, like so.


I'm very happy with the result.  And I'm still kicking myself for only ordering one pendant/brooch.

I hope Kathleen gets lots of use out of this.  And I hope that when she wears it she doesn't dread our (possible) return in 2012.


Posted by Picasa

Saturday, July 10, 2010

Deborah


It will come as no surprise to anyone who knows Deborah  that she was quite persistent in getting me to make her these earrings.   This woman is a riot, and I love her for it! 

So, she happened to be nearby when I gave Rachel a birthday gift last May, and wanted to know when I'd have some done for her.  
"When's your birthday?"  I asked.

"It's in March, but that too long to wait," She said.

I intended to comply, but my crafty to-do list is long and capricious.  And I lose interest in anything that becomes an assignment, even when it's an assignment I volunteer for.  So despite frequent status checks from Deb ("Diana, where my earrings at?"), it took me until her birthday to get them to her.
It shouldn't have.  This set was quick and easy, made from supplies on hand, and perfectly suited to Deb's style.  I've seen her wear each pair several times since her birthday.  (Although she told me recently that she lost one of each pair.  Maybe by her next birthday I'll get around to replacing them!)

In my usual fashion, I didn't get a chance to take photos before I left home, so I ended up throwing the camera in my diaper bag to take destination shots (in the nursing mother's room at church.  Lovely carpet, isn't it?).  And, of course, the battery ran out after a single click, so this is all I have.  You can see the hooks of the second pair peeking over the back of the card.  As I recall, they're gold with an amber dangle.  Maybe heart shaped?  I don't remember.  (And that's why I take photos!  Ideally.  Maybe next time.)    

Sunday, June 27, 2010

Baby baubles, baby bottles

I've got dozens of baby food jars piling up around here on account of a certain ravenous baby. I've been trying to think of crafty ways to recycle them, so this afternoon when I wanted to wrap up a baby bracelet, I decided to put one to use.


Cute, eh? Thanks to Kristie for the bracelet. I made it with her stuff at her house eating her creme brulee. It was awesome.

Next on the baby food jar agenda: this. Only shorter. Why don't you join us? I've got plenty of jars.
Posted by Picasa