Showing posts with label sew what. Show all posts

Wednesday, June 15, 2011

Emily

My dear friend Emily is leaving for a new job at Disney World.  Seriously, she gets to work at Disney World.  For money.


I knew she wouldn't want more junk to have to pack, but I wanted to give her a little something to send her off.  So I made this little toiletry bag, and filled it with snacks for the road.  (Chex Mix, red licorice, and peanut butter m&m's.  Plus a Taco Bell gift card.)

 I used three fat quarters in fun prints that remind me of Emily. 


And I lined it with clear vinyl, for easy cleaning of spilled foundation and smashed lipstick. (Or is that just me?)

I've seen cute laminated fabric/oilcloth projects, like this one, on other craft blogs.  I'm too cheap to buy real oilcloth, but I had some clear vinyl in my stash, and I've been wanting to see if it would work to overlay it on a printed fabric.

So, did it work?  

Ummm, for this project, not really.  It might be OK for something like this bib, or this book cover, but having the two interior sides facing each other turned out to be a major pain.  They kept sticking together, making the whole construction process a lot more cumbersome.  And I'm pretty sure it will affect usability too, since Emily will have to unstick it from itself just to load it up.  That is, until she spills foundation, lipstick, and loose powder inside.  Then it will be just right. 

Thursday, April 28, 2011

Dear Sarah Jane

Send me your address, and I will send you a surprise.


You'll never guess what it is!


I hope that these stripes are not too girly for the men in your household.  I don't think so though.  If anyone's got the good looks and boyish charm to pull off pastel stripes, it's your guys.

And I hope your little lady is not too old for twirly skirts.  Cause this one's twirly.  And if it were my size, I'd keep it.

Enjoy!

Tuesday, April 12, 2011

Last Easter

I've been scrolling through photos today, in preparation for a Top Secret Craft Project,* and I found these from last Easter. 


Actually, these were taken several weeks after Easter.  Because as you can see the grass is green and the flowers are in bloom.  And here in Buffalo, it might still be snowing on Easter Sunday.


Definitely not onesie weather.

Anyway, I've been thinking about what to do for this Easter.  And I'm trying to decide:  are polka dots too girly for my boys' neckties?


And, is this 8-inch bow too big for my girl's head?


Let me know ASAP, cause I've got Easter outfits to make.

 _______

 * Want to hear about my Top Secret Craft Project? Ask me, and I just might tell you.

Tuesday, February 01, 2011

The Very Colorful Caterpillar

After two rough and tumble boys, my friend Melissa just had herself a baby girl!   Ordinarily, I'd take this opportunity to make some kind of over-the-top frilly girl accessory, because after having a couple boys, nothing's more fun than challenging the accepted head-size-to-hair-embellishment ratio.

But Melissa's shower was a "time-of-day" shower, where each attendee is assigned to bring a gift suited for a specific time of day.  My assignment was "play time," and while I suppose girls can still wear giant flowers on their heads while they play, such shrubbery is generally not designed to be played with.

Photo credit:  Green Valley Crafts
So I dug through my bookmarks for handcrafted toys, and found this  little post from  Green Valley Crafts, a site you should not visit unless you have plenty of time to browse.    It's too lovely to leave.    Clever Clare created this sweet set of fabric & velcro balls for baby to toss, chew, connect, and dismember.  Cause that's what babies do.
Those cheery little blobs all lined up reminded me of a caterpillar, so I added eyes, antennae, and a crooked grin, and had myself a lepidoptera* larvae that, with any luck, will have a life cycle of more than three days.

I told Melissa that because of small parts (i.e. button eyes and felt antennae) this toy was not suitable for children under 3.  But unofficially, Miles (who is just one) really likes it.  I know because he kept stealing the little puff balls from my sewing table.

I chose rainbow colored fabrics from the stash in both solids and patterns, and included some with interesting textures.  So it's educational and all that.  Cause a baby might as well be getting smart while she's choking on a button.  Right?

Also, because I'm getting ready to move I'm kind of preoccupied with containing toys.  So I stitched up a pouch to keep the whole lot safe and warm when it's not "playtime."


Should I tell you where the fabric came from?  The old lady stash, of course.  But there's also a thrifted sheet, scraps from Halloween costumes, and random remnants.  Best of all, the exterior of the bag came from a little nightie I bought of the clearance rack at K-Mart.  It was cute, but not what you'd call "boudoir ready," and when Sweetie asked if I'd made it myself, I knew it was safe to cut up and add to the stash.  It looks like a Liberty of London print, doesn't it?


I was able to use most of the existing seams, and the straps became the tie that cinches the whole thing shut.  I love those kinds of time-saving shortcuts.

Speaking of shortcuts, I used this little butterfly clip to fancy up my lame index-card card.  I didn't make it.  It came from a friend who was de-cluttering her own craft stash.   But if you like it I bet you could make one for yourself, cause you're crafty like that.  Here, let me give you a closer look.


This whole project was easy enough that my 4-year-old, Grace, could help me with it.  I started by tracing a circle (I used a CD) on to each of my chosen fabrics, then cut out two of each color.  Then sew (or glue) velcro in place. (Mark the center circle of the CD on your fabric when you trace it to help with placing the velcro.)  Sew the around the edge of the discs, right sides together, leaving a 2-3 inch gap for turning.  Then turn the whole thing right side out, stuff with fiberfill  (this was Grace's favorite part), and hand stitch the opening closed.   


This project was quick, but not quick enough for the busy week of Melissa's baby shower.  As soon as Melissa opened the (unfinished) gift I took it back so I could stitch up the last few segments.  I sat there at the shower with a needle and thread, hand stitching as I chatted.  Cause that's how I roll.  

Seconds after snipping the last threads, I coerced my friend Kandis to take photos right there at the shower.  (Thanks Kandis!)  

And then, finally, I let Melissa load up her caterpillar and take it home.


___


*Butterflies and moths are members of the insect order Lepidoptera.  This is the only fact I still recall from the AP Biology class I took 18 years ago.  Why this fact, and not something more interesting and/or useful?  I don't know.  But it's a testament to the power of mnemonics, because my brain somehow made a permanent association between butterflies, moths, and leprosy.   This mental association also forces me to say "Lepidoptera" in an appalled and disgusted voice, as if the mere thought of colorful winged creatures is enough to make contract the disease.  All things considered, it's remarkable that I still like butterflies as much as I do.


Monday, January 31, 2011

Keeping track


You're probably wondering what's up with this blog.  And if you're not you should be. I mean, don't you think it's narcissistic the way I take pictures of every little thing I make, and then post pictures and go on an on about how I made it, what went wrong, where I go the fabric, and how much my floor needs mopping?  (Actually, I try not to mention that last one.  Maybe if I don't point it out, you won't notice.  Right?)
 
And you're right.   Blogging is a pretty self-indulgent hobby, and I admit I crave comments like a junkie, refreshing every few minutes until I get my fix  (which usually comes from Peanut).  (Thanks Peanut!)  Compliment fishing aside, though, this really is about me keeping track.  I keep track of what I've done, what I've learned, and how I did it, so I can do it again if I want to.  I can't tell you how many times I've made something and given it away without taking a picture, only to regret it later.  (Actually, I probably can tell you how many times I've done that.  THAT'S  how much I regret it!)  

I also keep track because maybe someday I might want to do something bigger with all this -- start a shop or get a job or something -- and a portfolio could really come in handy.  And I keep track because making and giving gifts is part of how I connect with people.  Thinking of the thing I made for you makes me think of you.  And I like you.  So there.
  
In between all the keeping track, if you find something that's helpful or inspiring or funny, well, I don't mind that one bit.  Feel free to tell me all about it, right down there in the comments.  Really.   Feel.  Free.

In the meantime, I got myself a little behind in the keeping-track department.    So here's are a project from way back in September.  It was quick and easy, and you should totally make one.  (For someone I don't know, of course.  Cause we don't want to show up with the same gift.  Awkward!)

It's a pampering kit for my friend, Kalie, who has 3 kids under 4, and really really deserves all the pampering she can get.

I covered a composition notebook with pretty fabric, and made a matching eye mask (based on this tutorial) and hot/cold pack (like this one, sort of).

 
Then I wrapped it up in a pretty box with a package of ear plugs and a scented candle, and took it to Kalie's "Pampering Shower"  (where you bring diapers or something to spoil the mom).
It would also make a nice get well gift, or swap things around a little and give one to your mom.  Or my mom.  Or anyone else who deserves to be pampered.


I think the notebook is my favorite part.  Since I happened to get a whole stack of composition notebooks for 10 cents each during back to school season, I whipped up another one for another friend's birthday a few days later.

I haven't started mass production yet, but it's really only a matter of time. 


Now, when's your birthday again?  Maybe I need to make myself a pretty notebook to keep track.

Tuesday, January 25, 2011

Eclair

In the spirit of giving welcome baby gifts to 6-month-olds, here's a little something I just presented to a pretty little girl named Emma-Clair, who is so sweet she's cream filled.   And they call her "Eclair."  And I think that's just about the cutest thing ever. 


So I added a little eclair applique,


which Miles really liked.

That's his grubby hand right there, trying to pry it off the blanket.  Don't worry.  I stitched it on tight.
 
Like practically everything else that comes from my craft room, the story of this quilt began in the clearance bin.    I needed some new blades for my rotary cutter, and happened upon a chenille cutter marked down 75%.  I had no idea what I'd do with a chenille cutter.  But I knew it was cheap, and I figured it could cut fabric, so I brought it home with me.

Not long after that, I happened upon this tutorial on Aesthetic Nest, and suddenly the instructions that came with the chenille cutter made a lot more sense.


So here's how it works.  You layer several pieces of flannel (or other soft cotton)  and then stitch in parallel lines on the bias. 
Then when it's all stitched up, you use your chenille cutter to slice between the stitches.  And then you add embellishments, or whatever, and then bind it.  Then you throw it in the washer and dryer, and all the raw edges you cut curl up and get fuzzy.  The more you wash it, the more it curls.

The process is a little time consuming, but it's straightforward.  And actually kind of fun.  I used a set of flannel receiving blankets, so the finished quilt is pretty small.  I don't think I'd want to tackle anything bigger, cause I'm lazy, and even turning this little thing under the arm of my machine was a little cumbersome.

I do have one little tip I didn't see mentioned in any of the online tutorials I found.  Dana at Made (see her version here)  suggests changing your needle position to get the lines spaced evenly about 1/2 inch apart.  But I can't adjust the needle position on my machine, my presser foot was too narrow to use it as a guide, and I didn't want to have to draw lines to follow for the whole quilt.  So I added a piece of stiff tape to the bottom of my presser foot and lined the edge of the tape up with the previous line as I stitched each new row.    Like so:


After a while the tape started to curl up, and I'll admit I rushed things a bit, so the rows are not perfect.  There are other flaws too, but I won't bother pointing them out, because if that cute baby Eclair is anywhere nearby, I guarantee no one's gonna notice a few wonky lines and errant stitches.  They'll be too busy tickling her cream-filled belly, or gazing into her gorgeous chocolate eyes.


Tuesday, December 14, 2010

Melanie

Melanie is cute and stylish and hip. And she's moving away.

I wanted to send her off with something useful and pretty that she wouldn't have to pack or wrap or box.

So I came up with this little makeup bag.   It went together really quickly, once I finally found the right fabric.  I sorted through lots swatches to find the right combination of cute and stylish and hip.  In the end I went with a couple home dec samples and a strip of golden silk, all picked up for next to nothing at the JoAnn closeout sale from whence my stash was born.

I know it's totally tacky to make a gift for someone and then brag about how little you spent.  But it's part of the thrill of creation for me, and at this point in my life I've given up hope of de-tackifying.  So, the zipper was 10 cents (They were begging us to take them at 10 for a dollar.  I'm kicking myself now for only buying 20.), and the sample squares were about $1.  So, I used about one square total (half for the inside lining, half for the outside), plus a smidge of silk, which I'm arbitrarily valuing at 20 cents. And there you have it: a pretty little purse for less than two bucks.

But wait!   There's more!  You can't just give away an empty purse. 

So I whipped up these dangly earrings.  As with the purse, selecting and planning took longer than executing.  It takes time to get it just right.    

And again, these were 100% stash-made.  The tear drop components and the ear wires are leftover from the supplies I bought in July to make jewelry for my sister's wedding.  The chain is cut from an old necklace from my salvage box, and the beads were hand-me-downs from my friend Amy.  Less than a buck spent there. 


Plus, I earned major stash reduction points.

Have I mentioned that I'm moving in 6 months?  And that my goal is to USE my stash, not MOVE it?  I'd better get to work!
Posted by Picasa

Sunday, September 26, 2010

Snugglesaurus


For Tiffany's baby boy.

Dinosaur silhouette from this template found here.
Posted by Picasa

Thursday, August 26, 2010

Keep it clean

I'm a little bit in love with this fabric. Maybe a lot in love. It's from the Old Lady Collection, 100% vintage.

I'd been wanting to use it for a while,  so I was kind of excited when Amber chose it for the main print on her birthday napkins.


It's not  hard to make cloth napkins:  1. cut out squares, 2. sew.  (And there are lots of good tutorials out there.)  But I experimented a lot with different combinations of interfacing and lining fabric to get the right weight and feel.  In the end, they're all a little different, but still perfectly suited for dabbing at a spill or wiping crumbs from your lips.  (I say "your" lips because not "my" lips because cloth napkins are pretty useless around here.  Our messes require the power washer/ beach towel approach.  And if I'm putting something in my lap to catch spills, a tarp is really more appropriate.   Why protect my lap but leave the surrounding area exposed?)  But anyway, I'm sure these will do just fine when Amber invites the Queen for a picnic brunch.  As long as she doesn't invite me too.

It's all stash fabric, except for the blue print.  That I purchased from Jo Ann just for this project.  I hardly ever do that -- wander around the store with fabric swatches looking for something specific.  Usually, I scour the remnants and clearance fabrics, and if I find something cheap and pretty I take it home.  Then when I find a project I want to tackle I shop my own shelves.  (And by "shelves" I mean "shelves and bins and closets," cause we're a little past neat piles at this point.  It's time to recommence stash reduction.  Who's in?)

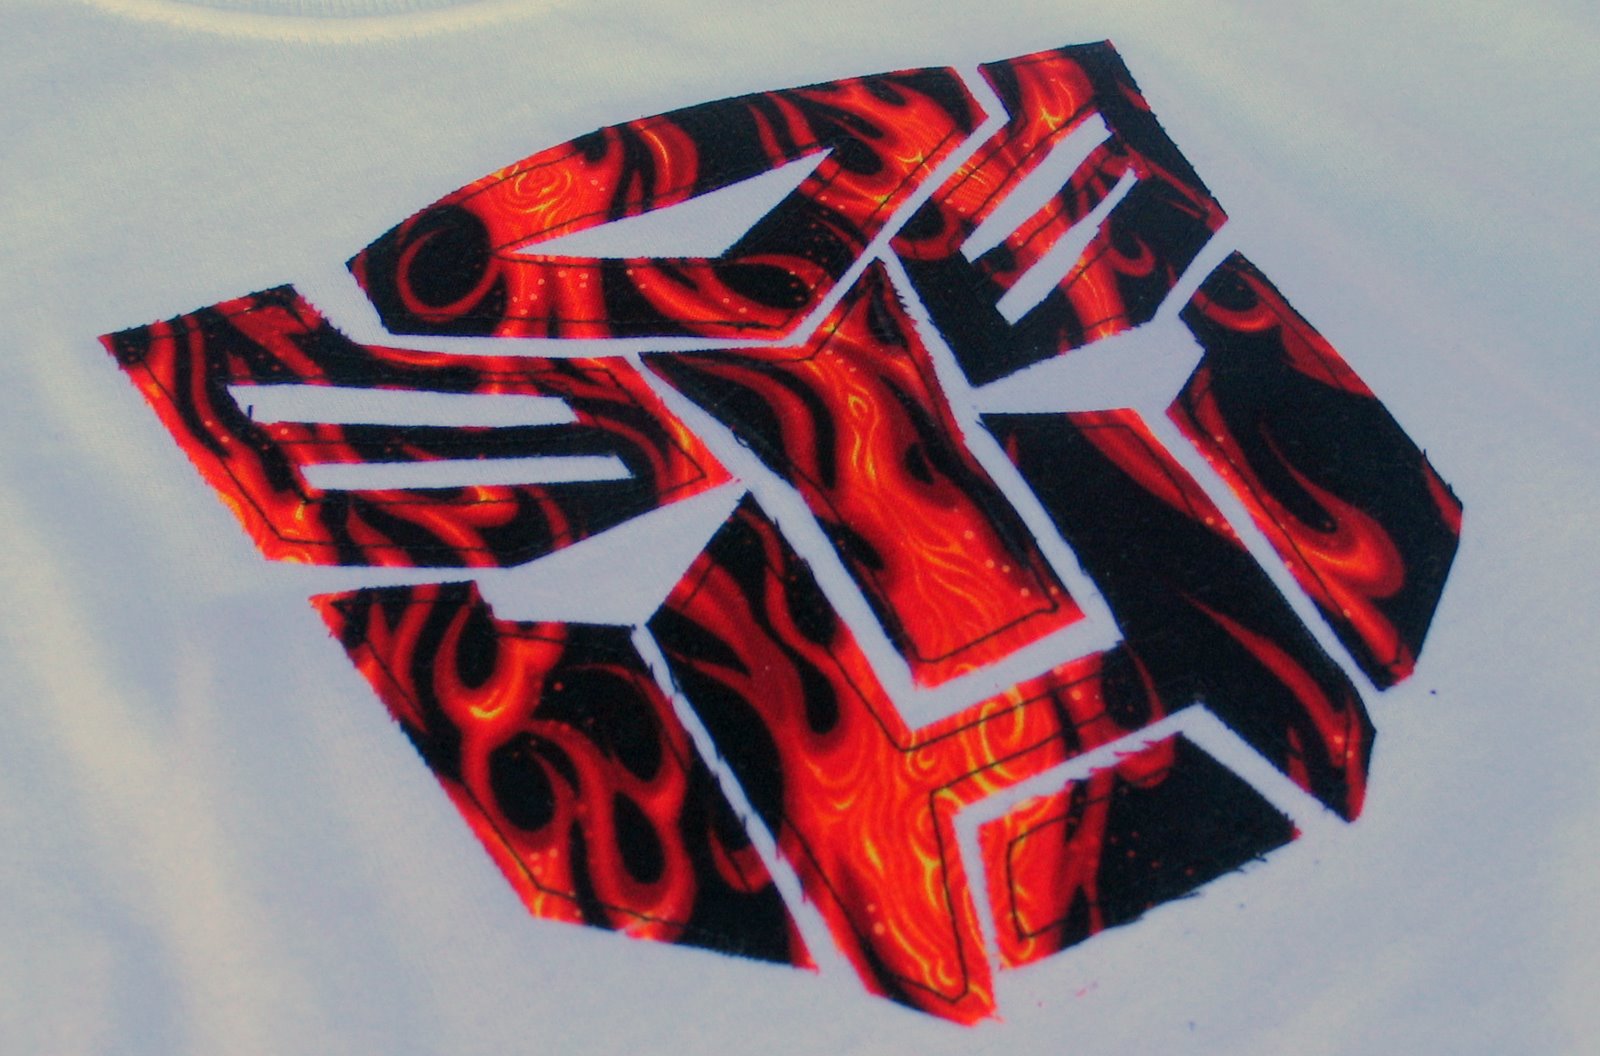
More than Meets the Eye


For Daniel, who likes Transformers.  Watch out kid.  Your pants are on fire.


PS:  If you think those pants are hideous here (and I do), you should see them on a child.  Both of my kids tried them, and in both cases I wanted to gouge out my eyes.  They're too  '80s post-Hammer pants for my liking.  But I guess they work with the shirt.  As pajamas.  For someone else's kid.    Sorry Margaret.
Posted by Picasa

Sunday, April 25, 2010

Super O!

I'm often annoyed with myself for forgetting to take photos of a project before giving it away. Usually, in the rush to get out the door to the party or shower, I don't take the time to snap a few shots, and then I regret it later.

This time, however, I almost regret taking the photos. This project looked better in my memory than it does here in the photos, which I just pulled off the camera and looked at for the first time this evening.

The model looks sharp, I'll admit (he always does), but the details are sloppy. The cape looks wrinkled and ill fitting, and close up especially, the appliques are a mess.

See?


And see?

But you know, this blog is more about recording my projects and the things I learned while making them than just showing the pretty pictures.

So, while I love this metallic gold fabric (also used for princess crowns here and here), I won't use it again for an applique project -- or anything else that leaves raw edges exposed. It just falls apart too easily. And I really need to work on my stitching technique. How do you backstitch a zig zag stitch without the overlap looking so sloppy? (See the (not so) super O above?) I stuffed the CTR letters to add dimension, which I like, but there are several sections of batting peeking out the edges, which I don't like. There's got to be a better way to do that. And I don't know if it's because they're polyester or what, but both the black and the blue background fabric were impossible to get (and keep) wrinkle free. I pressed and pressed and pressed that thing, and it still looks like it spend a month in the trunk of my car. (Not that anything would ever sit in the trunk of my car for a month, of course.)

It's frustrating to spend time on a project and not have it turn out as well as I'd wanted. And yet, I still count this one a success. I was happy with it when I wrapped it up (it's been a couple weeks now), and all reports say Super O loved it. It was made entirely from the stash, I completed it in just a couple hours, it's personalized, and it's not plastic. Plus it's righteous. What more could a six-year-old want? Perhaps most encouraging, Sam wants one for himself. (I think for him, though, CTR stands for "Choose the Rocketlauncher." He's really into munitions lately, but that's probably and entry for another blog.)


Posted by Picasa

Saturday, February 20, 2010

Three

Grace turned three, so I made her three dollies.

I'll admit that some of the details were more for me than for her. Jaguar ruffles, rhinestone barrettes, vintage lace and buttons.


But I think she likes them anyway.

Posted by Picasa